- The information on this page for the mode prior to Update 4.0.0. For the current, see The Origin.
The Origin (Legacy) was an endless wave mode of the game.
Story

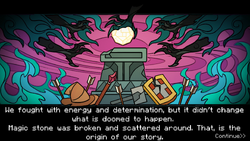
The present heroes time-traveled before the loss and destruction of the Magic Stone and attempted to avoid its tragic fate by fending off the onslaught of foes attempting to seize it. Unfortunately, the cataclysmic event was inevitable - the enemies overwhelmed them and shattered it, and the world plummets into chaos, with history repeating itself once again.
Access
The entrance to The Origin is the Ancient Portal.
Entering it requires 500 gems.
- With the Mode Hopper card, the player is able to access The Origin for free once per day.
Gameplay
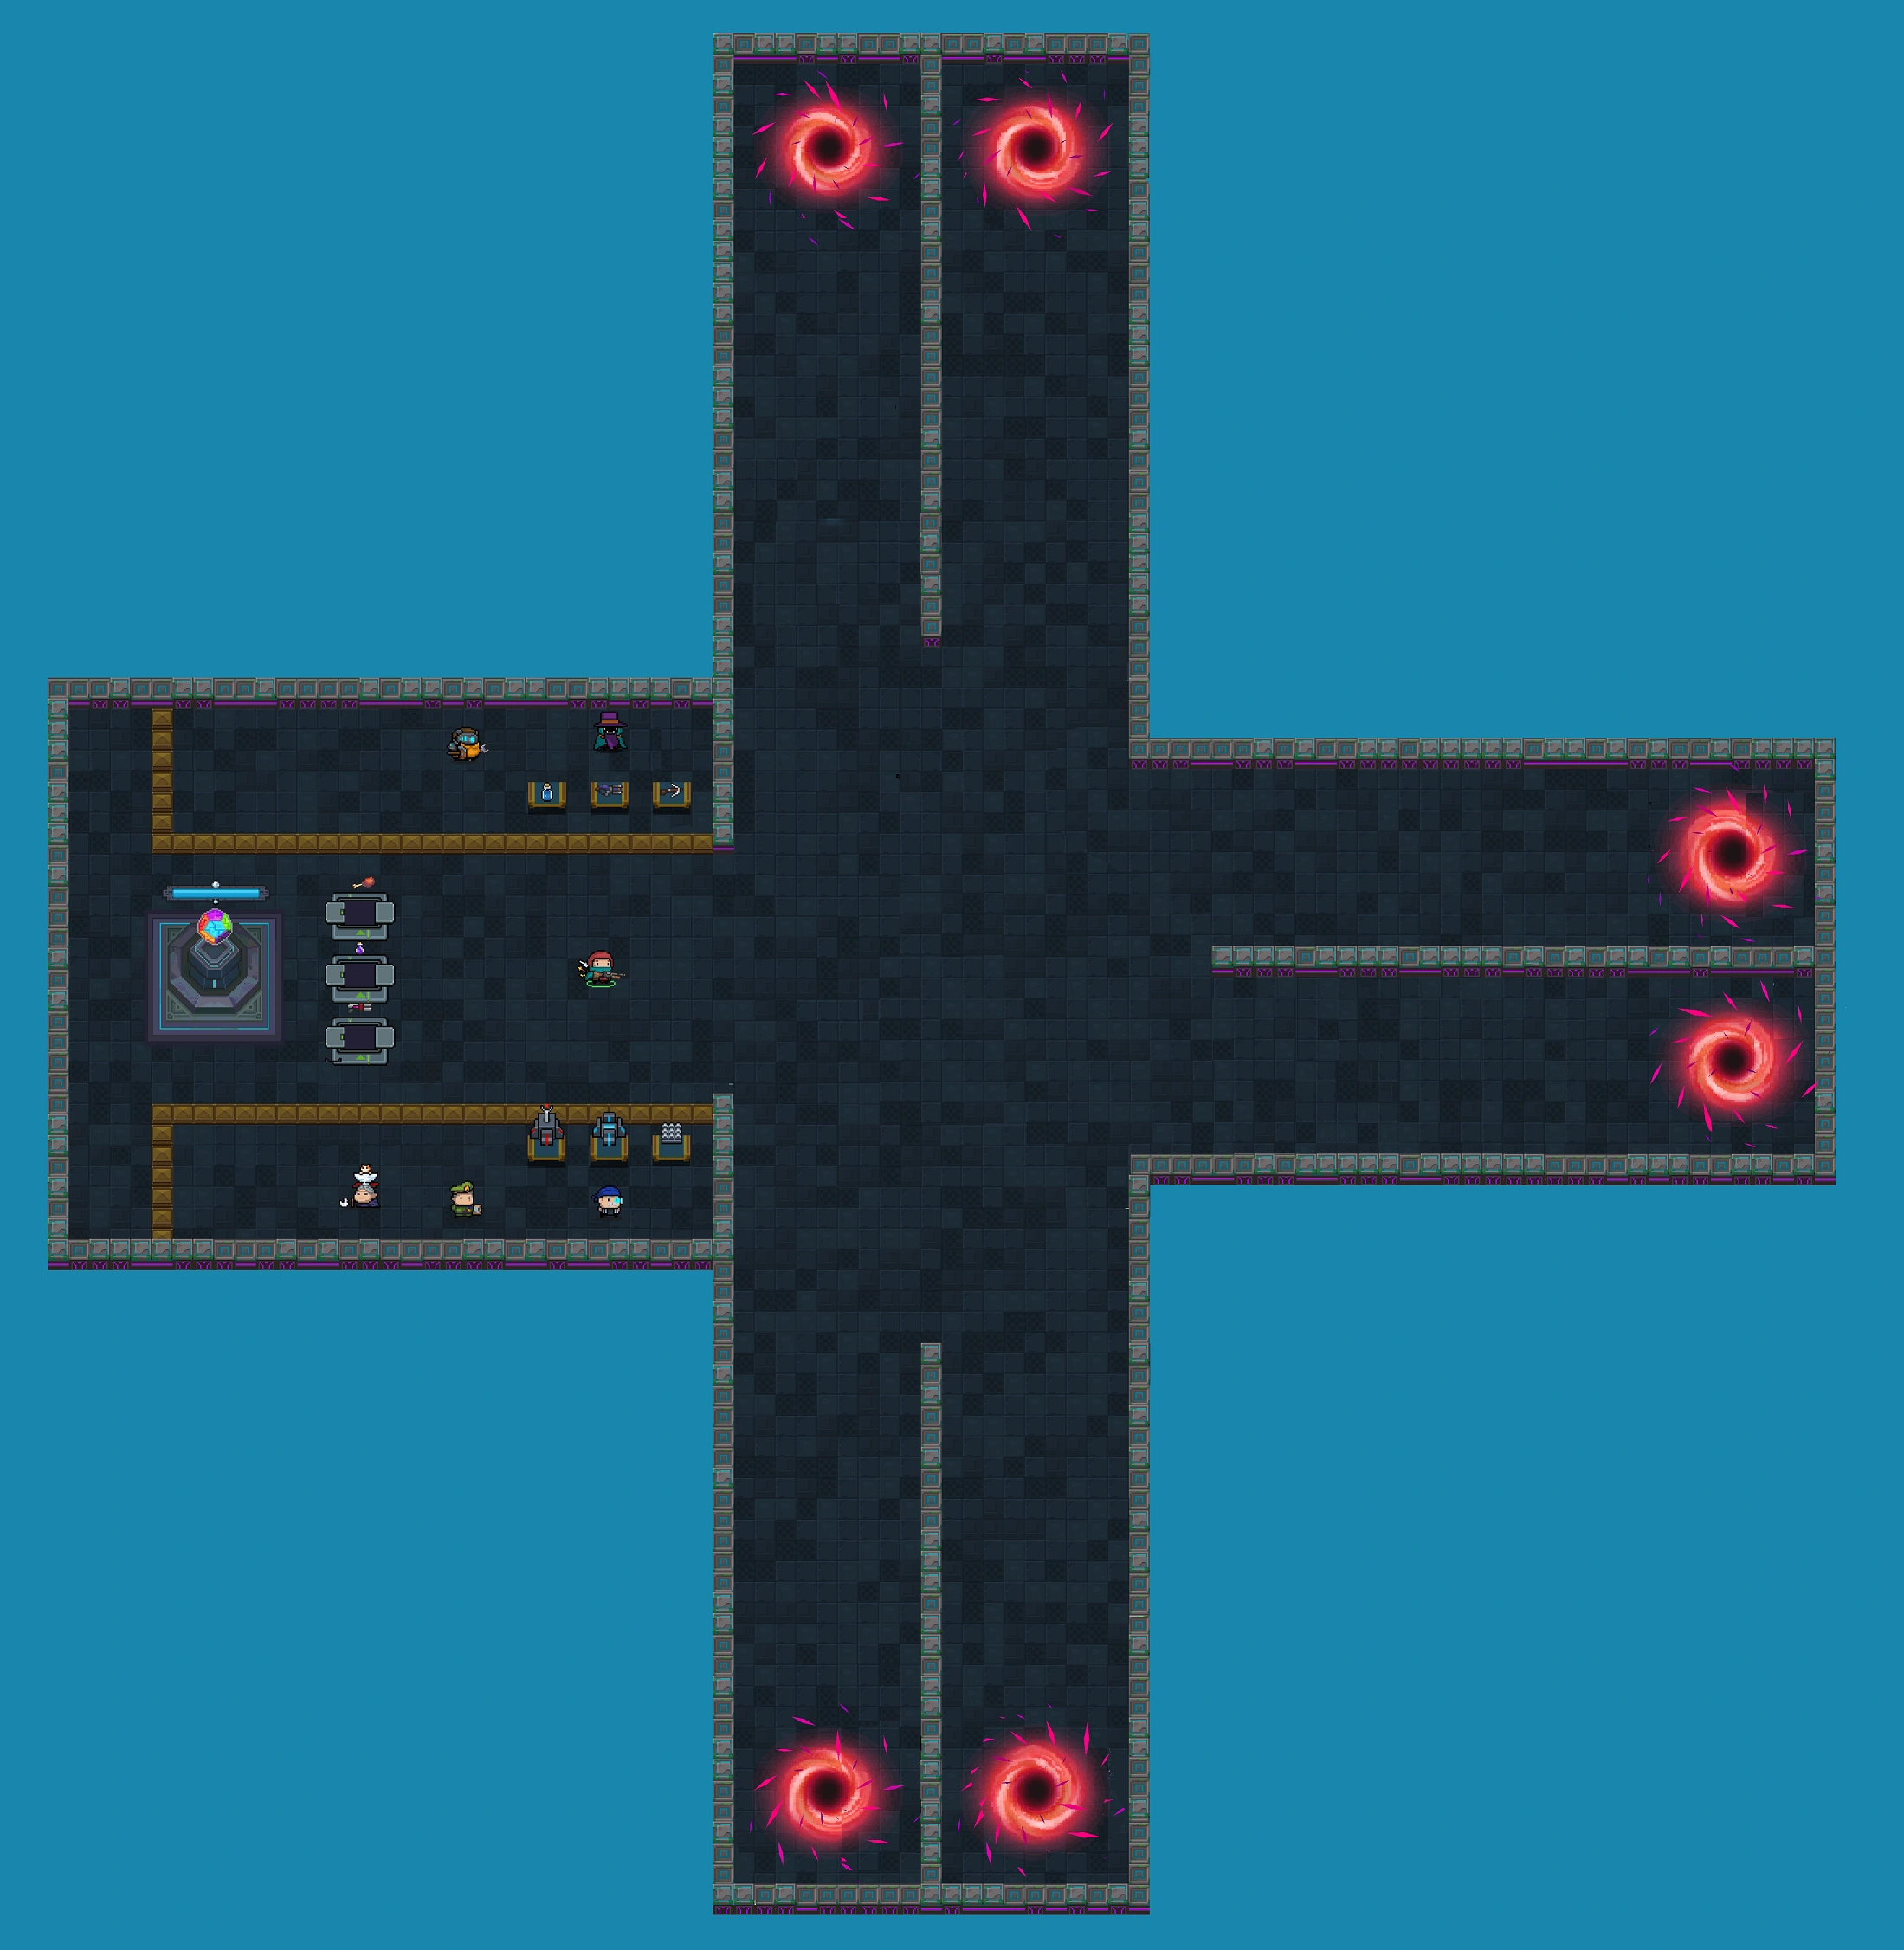
The Origin Layout
In this game mode, the player must defend the Ancient Magic Stone from hordes of enemies that spawn in waves. The game will end once the player has died, or the Ancient Magic Stone is destroyed. The player can upgrade their defenses through the help of the NPCs inside The Origin. The goal is to hold off the enemies as long as possible.
Ancient Magic Stone
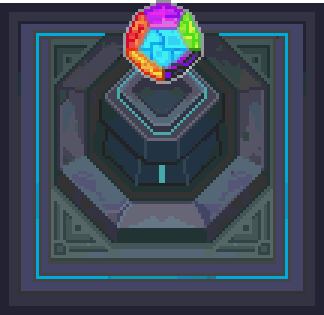
The main objective of the game. Enemies will attack it, the player must defend it. The Ancient Magic Stone can take a certain amount of damage before being destroyed, and the only way for the enemies to damage it is to ram into it. Enemies will die instantly (including Bosses) after ramming into the Ancient Magic Stone, while dealing damage scaled to the remaining health of that enemy. The Ancient Magic Stone cannot be damaged by any other attacks.
- For example, a minor Goblin Guard (Goblin Spear) can only deal a little amount of damage, while a Christmas Treant will deal a lot. However, if the boss had very little health, it'll be a scratch.
Once it has been destroyed, the Magic Stones will scatter around in different directions and end the game.
Waves
Each wave spawns enemies. Before every wave, there is a preparation time for player to set up their defense. This is the enemies and preparation time for every 15 waves:
| 1st | Mobs | 15 seconds |
| 2nd | Mobs | 15 seconds |
| 3rd | Many mobs | 35 seconds |
| 4th | Mobs | 15 seconds |
| 5th | All-Elite mobs | 35 seconds |
| 6th | Mobs | 15 seconds |
| 7th | Mobs | 15 seconds |
| 8th | Many mobs | 35 seconds |
| 9th | Mobs | 15 seconds |
| 10th | All-Elite mobs | 35 seconds |
| 11th | Mobs | 15 seconds |
| 12th | Mobs | 15 seconds |
| 13th | Many mobs | 35 seconds |
| 14th | Mobs | 15 seconds |
| 15th | Bosses | 35 seconds |
Enemies
At the start of each wave, enemies will spawn from the Portals. The Purple portal in the minimap indicates the spawn and route of enemies for that wave, whereas the Blue portal indicates that that portal and route will be idle that wave.
They will try to ram into the Ancient Magic Stone, and attack anything in their way.
- Their priority of attacking is: Blindage > Hologram Turret/Booster/EMP Device/Energy Device > Player > Ancient Magic Stone.
Enemies get a speed boost upon spawning, similar to stepping on a Boost Tile.
Every 15 waves, enemies (including Bosses) will have their health increased by 100% of their regular health. This stacks with the double HP condition so enemies' health will scale to twice as high and doubling from there. It is possible for the values to reach even five to six digit numbers in later waves.
Every 45 waves, damage of enemies are increased by 2 each hit, except for the lasers, shockwaves and ice trail attacks of Bosses which are not affected. Sometimes, the splash damage from an energy explosion will also not scale up.
Enemies in every 15 waves come from the same biome, such that there won't be any possibility to have Goblin Giant (from Forest) and Snow Ape (from Glacier (Level)) together. In every 45 waves, the first 15 waves are chosen from level 1 biomes, the middle 15 waves from level 2 biomes, and the last 15 waves from level 3 biomes. If all 45 waves have been completed, the game will restart the cycle.
Enemies that do not walk normally (like Frog, Battery (Enemy) and Devil's Snare) do not spawn from portals, but may appear as a result of the Summoner. In the case of the Frog, it may spawn after transforming an enemy with the Staff of Anubis as well.
Items and Upgrades
There are 3 pedestals to the right of the Ancient Magic Stone that look like the ones in the Turrets Room. During preparation time before waves, the pedestals spawn items for player. Each time player can only choose one item, causing other items to despawn. The items can be:
- A potion and two weapons.
- 3 weapons.
- 3 buff bubbles.
The player can get 10 buffs from the pedestals. The pedestals spawn buffs every 5 waves. Activating any modifiers related to buffs will increase or decrease the max number of buffs the player can get, but will not affect the number of buff choices, though this may be subject to change in a future patch. Getting buffs from the Garden, however, allows the player to hold up to 19 buffs. They can only provide buffs the player doesn't have and should they not choose a buff, it will offer a different selection of buffs after finishing a wave.
Note that if a weapon is placed on the ground for more than 12 seconds, it will disappear. Attachments do not despawn, unless the player quits the game.
There are some NPCs inside the Origin to aid the player in defending the Ancient Magic Stone. Once the preparation time for waves ends, they will be locked out of the battlefield and the player cannot get to them during waves unless they are already inside the NPC area. There are 5 NPCs:
- Trader - Sells a Potion and 2 random weapons. Gets restocked after every wave.
- Mentor - Increases the player's health, armor or energy. Also increases skill effects if possible.
- Summoner - Summons a random item or NPC. Can be a mercenary, statue, easter egg, a chest, bomb, or certain enemies.
- Weaponsmith - Increases damage of the player's weapons.
- Mechanical Engineer - Sells Hologram Turret, Blindage, Booster, EMP Device and Energy Device. Upgrading them increases their health and heals all present devices to full health. The Priestess can also heal the machines.
Towers
The Mechanical Engineer provides 5 types of turrets. When any tower is purchased, they will be held in the player's weapons slots, and can be deployed anywhere on the battlefield. Each of them can be healed with Priestess' Regeneration Pact skill.
| Tower Name | Image | Function | Notes |
|---|---|---|---|
| Blindage | 
|
Acts as a barrier that fends off enemies and their projectiles. During preparation time before each wave, players can walk over the Blindage as they will sink into the ground. However, they will still take damage from any lingering enemy projectiles.
|
|
| Booster | 
|
Creates a large red hexagon. Any non-enemy projectiles that pass through the effect radius will become enlarged.
|
|
| EMP Device | 
|
Emits a radial blast that destroys all enemies' projectiles in a 2-tile radius, except lasers and shockwaves. Deflects projectiles instead if the Reflect Buff is present. The delay between emissions is 4.5 seconds. |
|
| Hologram Turret | 
|
By default, it fires a burst of 3 bullets that deal 2 damage each. During the preparation time of waves, the player can deploy their current weapon onto the turret. The turret has a delay of 1.5 seconds between attacks. Each upgrade slightly reduces the delay, until the turret has a 0.3 seconds delay. Any weapon held by the turret will be lost once the turret is destroyed.
|
|
Tips
There are many strategies to this mode. A recommended strategy for the player is to use their coins on buying and upgrading Blindages. This creates a very strong defense to cope with the enemies' gradual damage increase.
The Blindages' placement is not that important; however it is advised to place not more than 2 to 3 rows of blindages. The rest of the player's coins should be used to upgrade them and buy Hologram Turrets.
The Priestess' healing skills (especially Regeneration Pact) are very helpful as the player can repair the turrets and the walls for free, allowing them to save money on more important subjects. The effect can be improved with Mentor's upgrades, allowing her to heal massive amounts per skill use and withstand longer against gunfire. It also prevents significant spending increments as the mechanical engineer's upgrades are rarely even needed unless the enemies are really overwhelming the defenses.
It is recommended to bring in Railguns, Launchers and Laser Guns since they can damage multiple enemies at once. Weapons that can Freeze or Stun like the Glacier are also useful for hindering enemies from damaging the player's defense. The Pierce Buff along with a powerful ballistic weapon, or those who have infinite penetration like Soul Calibre are also optimal choices. Boosters, EMP Devices, and sometimes energy devices are critical too, as one boosts damage to compensate for the high health levels, the other can occasionally neutralize projectiles, and the final tool can potentially help with energy shortages.
It is not recommended to use melee weapons, as the Blindages would tank most of the projectiles anyways. Bouncing projectiles are still a major concern, however, as they can damage both the player and their defenses. That being said, the EMP can take some heat away from the blindages, but the player should not rely on them completely and instead, focus on taking down enemies as fast as possible.
Try to put as many turrets as possible and arm then with the best possible weapons, as their damage DO NOT scale. Therefore, 2-3 Boosters are recommended, as they can enhance groups of turrets at once. The weapon pedestals can even make the painstaking Star Bow absurdly easy to obtain, so keep an eye on what it offers. Implosion and Horn can help with damaging hordes of enemies by grouping them together, making them much easier to damage.
Taoist has a glitch where he can use multiple weapons of every kind. Get to the 6th upgrade and unlock Tao Arts, collect a weapon and then get anything from the Mechanical Engineer, use it and the weapons will be floating ready for attack, it is not known if there is a limit (Verification Needed)
It is also possible to enhance weapons using the Weaponsmith before placing them on Hologram Turrets, such that they can deal more damage. Note that it is impossible to upgrade them any further once this process is done.
Rewards
As the game is endless, this mode will always end in failure.
In The Origin, enemies and bosses can still drop materials (though the rate seems to be reduced), the player still has to collect them manually.
After the game, Gems obtained can be calculated by the formula:
(trunc() means rounded down.)
"Extra Gems Buff adds an additional of (0.05*[Gold remaining] + 0.03*[Enemies killed]) Gems each game.
Related Achievements

|
Loyal Guard
Defend attacks of 16 wavs in mode The Origin. Reward: 3 |

|
Defender of Shrine
Defend attacks of 31 waves in mode The Origin. Reward: 3 |
|
The Last Wall
Defend attacks of 46 waves in mode The Origin. Reward: Garden plot
5000 Cassette [Till the End of Dawn] |
Trivia
- This mode was added in Update 2.5.0. And was replaced by the new Origin in Update 4.0.0.
- Pressing the Magic Stone will say "Start a new wave?" and if interacted with again, a new wave will start immediately.
- In Chinese it's called "Shrine Defense" or “守护神殿”.
- The name of this mode is derived from the "Continue game" button on the main menu.
- Enemies do not spawn in the portals where they are supposed to spawn. Instead, they spawn in front of them.
- The amount of enemies/turrets/projectiles potentially appearing the game will be so dense, that one's device may suffer from significant lag or even crash outright, especially after reaching three and four digit waves. This heavily depends on the device, however, as well as its processing abilities.
- Due to this, all arrows lodged in enemies, wrecked blindages (which may take longer to despawn) and defeated enemies will always despawn after a few seconds. Still, the lag may be extremely high after some time without the use of the "Double damage and half attack speed" condition.
- Easter Bunny's minions and Mummies/Frogs created from the Staff of Anubis don't despawn when defeated unless the player quits the game and re-enters. These will also contribute to lagging issues.
- The only exception to this is from enemies spawned via the Summoner. As they despawn after the next wave, the transformed mummy will also despawn, regardless if it's defeated or not.
- The Christmas Treant is static at phase 1, so when spawned, it instantly enters phase 2 and starts charging, dropping energy in the process.
- All lingering enemy attacks can damage the defenses even a wave has ended. This includes blindages who supposedly retreats under the ground until the next wave start. Additionally, turrets will not fire before the next wave even if there are enemies in front of them (As sometimes boss-summoned minions may not die when they are defeated).
- A turret WILL fire at lingering enemies if it was placed after the wave ends, but only for that pause period, with the enemy still alive. When the next wave starts, they will be engaged like any other enemy.
- For the re-rolling feature, the player can quit once per wave and progress is saved after completing each wave.
- As the Staff of Anubis technically defeats enemies before spawning a mummy/frog to replace them, transforming all enemies with this weapon will automatically cause the current wave to end. The mummies will still attack the player's defenses, however. This glitch can cause extreme adverse effect as the turrets won't engage them, which may lead to the collapse of the player's defenses.
- The ending cut-scene only appears if the magic stone gets smashed or if the player dies and have exhausted their revives.
- Originally, the game had a bug where the player can't leave the NPC area if they are inside when enemies spawn. This can potentially cause the defenses to be demolished easily.
- The Baby Dragon Bros in The Origin wouldn't drop anything when this mode was first introduced.
- This was fixed in Update 2.6.0.
- The Rogue, Wizard, Paladin and Grand Knight appear on the loading screen. However, the other minor enemy knights are exclusive to this image, as enemies in the Knight Kingdom do not use spears.
- In Update 2.8.7, the Horn's damage could stack in a rather exponential way when paired with Boosters. This way, the player could easily scale up their Horn's efficiency with only Boosters. They could then hide themselves and their Boosters inside the gates, and after equipping a Fully Automatic Device attachment to their Horn as well as placing a couple Energy Devices, go AFK and reach further than usual without doing anything. The more Boosters the player placed, the more damage the Horn dealt. This could easily scale up to six-digit values of damage with only a handful of about 30 Boosters. This was seemingly a bug and was patched in Update 2.9.0.